If you already own skis or a snowboard, looking after them properly will make a huge difference to how they perform on the mountain. To help you keep your kit in top condition, we asked our friends at Local CHX — a trusted ski hire shop and ski delivery service — to share their expert ski waxing advice. Ski technician Sam has put together this clear and comprehensive guide with his top waxing tips, helping you get the most from your equipment and keep it gliding smoothly for years to come.
Ski waxing tips from Sam
I’m not going to pretend to be the Yoda of ski tuning, but after a fair few winter seasons I’ve learned that waxing your skis is a key part of being a ski bum — or simply someone who takes pride in the gear they’re sliding down the mountain on. I picked up the basics from a guy whose name I can’t even remember, somewhere between shifts at a pizza shop during my first season in Methven, New Zealand.
Since then, I’ve gathered enough solid advice from reliable sources to share some useful ski waxing tips. And for the sake of simplicity, I’ll stick to talking about skis — it just sounds more natural to me (and we all know skiing is the best form of snow sliding anyway!). So, here it goes…
What you need
It doesn’t take much investment to get set up with the basics for maintaining your skis. A few key tools will help you keep your kit running smoothly:
You’ll need strong elastic bands to hold the brakes out of the way if you’re a skier. You’ll also need an iron — ideally a proper waxing iron rather than an old household one you found in your rental apartment. Domestic irons fluctuate in temperature and can easily overheat, causing damage to your ski bases.
You’ll want a good wax too. For most skiers, an all-temperature wax works perfectly well. Temperature-specific waxes exist, but unless you’re committed to measuring the snow every day, they’re unnecessary. Fluorocarbon waxes offer higher performance but come with a higher price — and potential health risks. If you use them, make sure you’re in a well-ventilated space or wear a mask.
A scraper is another essential. Plastic scrapers are simple and effective, while metal scrapers can work well if you trust your technique — just be aware they’re harsher on the base.
Finally, you need something to brush out the excess wax. While I used a heavy-duty green kitchen sponge throughout most of my “professional ski bum” career (recently upgraded to executive ski bum, thank you very much), a proper ski brush will always give better results and help improve performance.
Preparation
Preparing your skis isn’t the most glamorous part of the process — that honour goes to the feeling of gliding down the mountain on a freshly tuned pair — but it’s essential if you want your wax job to actually work.
You can’t really wax your skis too often, but if you start spotting visible white patches on the base, they’re drier than the start of this season. You’ll also feel them dragging and slowing you down on the snow.
Take a close look at the bases to check for any damage that waxing alone won’t fix. Deep gouges or core shots will need filling with P-Tex first, which you can also do at home before you start waxing.
It’s also worth checking the overall condition using a straight edge. If your skis are “railed” (edges sitting higher than the base) or “base high”, it’s time to hand them over to a professional. They may need a base grind to bring everything back to true — and that’s not something to DIY.
Before waxing, make sure your skis are completely dry, at room temperature, and free from dirt or debris. A quick wipe with a cloth will sort that out.
Applying the wax
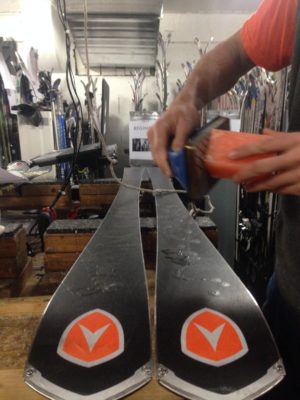
Drip your wax on to your skis
Start by setting your skis base-up, using blocks so the bindings sit clear of your work surface. If you’re on skis, use rubber bands to pull the brakes up and hook them over the heel piece — this keeps everything tidy and out of the way.
Hold the hot iron above the ski and press the wax block gently against it so the wax begins to drip onto the base. Move the iron steadily along the length of the ski to create a thin, even trail of wax. With practice, you’ll learn exactly how much you need — it’s something that comes naturally over time.
Once you’ve dripped the wax on, use the iron to spread it evenly across the entire base. Keep the iron moving at all times to avoid overheating any one spot, as too much heat can damage the ski. If you notice any dry patches, simply drip a little more wax in that area and iron it out. The aim is to let the melted wax absorb into the tiny pores and structure of the base, giving your skis the smooth, fast glide you’re after.

Keep the iron moving for waxing your skis
After this step, give the skis time to cool. Let the wax harden fully while you take a break — grab a pint, a coffee or even a quick siesta. After about 30 minutes, they’ll be ready for the next stage.
Finishing
Once the wax has cooled and the skis are dry to the touch, it’s time to scrape. I never used to think much about scraping direction, but after a few recent chats with fellow home-waxers, I’m now convinced it matters. Angle your scraper slightly and work from tip to tail, removing all the excess wax. Keep repeating this motion until the bases look clean and smooth.
You might hear people say they “ski off the wax”, but that’s not something I recommend — it won’t give you a good finish, and it’s not great for the longevity of your skis either. Most scrapers have a small 90° corner too, which is perfect for cleaning wax from the edges.
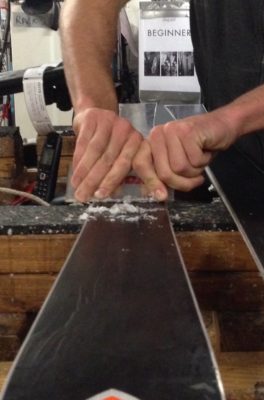
Scrape the wax off in the direction of the ski – tip to tail
After scraping, it’s time to give the skis a proper brush. Working tip to tail — ideally to the soundtrack of One Direction — use medium-length strokes with firm, consistent pressure. Keep brushing for at least five minutes and you’ll notice the bases start to look glossy and polished. I always finish with a few long, full-length strokes from tip to tail, and then your skis are ready to go.
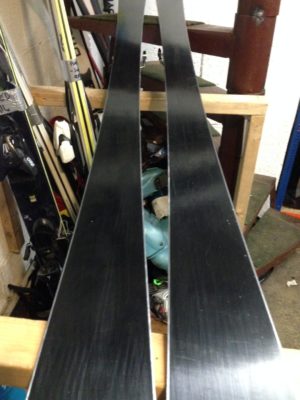
Your skis are ready to ride – nice glossy finish after a solid brush
A very wise Goat in Squaw Valley once gave me a piece of advice I’ll never forget: new skis need to be waxed. Simple, but true. New skis often sit around for long periods and gather dust, which dries out the bases and causes them to shrink. So when you get a fresh pair, give them a proper wax — following every step you’ve just read. (And for clarity: Goat’s real name is Ron. He’s an absolute guru and possibly the best ski technician on the planet — but for safety and respect, always address him as Goat.)
Now for de-tuning — a concept you might not have heard of, but one that’s essential at the end of the season when ski wax makes way for surf wax. Two key things to do:
First, give your skis a final wax but leave it on. Storing them with wax protects the bases from drying out during the summer. Second, wind down the DIN settings on your bindings. The springs sit under constant tension, so loosening them relieves pressure and helps them last longer.
These ski waxing tips should help you glide faster, extend the life of your skis, and give you the satisfaction of being able to maintain your own gear. Now get out there, enjoy the mountains — and always respect them.
A huge thank you to Sam from Local CHX for sharing these expert ski waxing tips with us. And if you don’t have your own skis or snowboard, don’t worry — we can still help you hit the slopes with great-value ski hire.
Local CHX are one of our most trusted ski hire partners, and thanks to them, all Chamonix All Year guests receive 30% off ski hire when booking in advance, or 20% off when arranging equipment in-resort. We also work closely with their team to offer ski hire delivery to our chalets and properties outside Chamonix centre, giving you a convenient option when a shop isn’t within easy walking distance.
Book your discounted ski hire through our Resort Shop.